Nail enthusiasts
love our products
Are you the next?
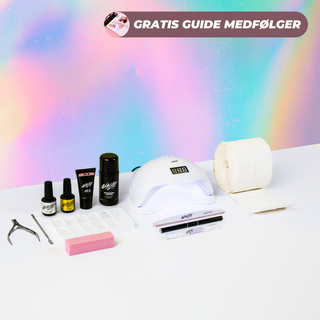
What does the polygel basic kit contain?
Here you can see all the products that come with when you purchase a polygel basic kit.
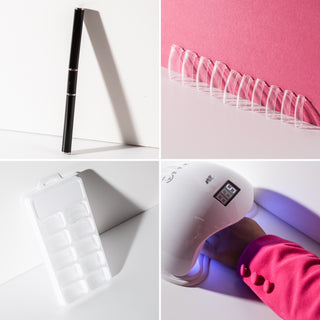
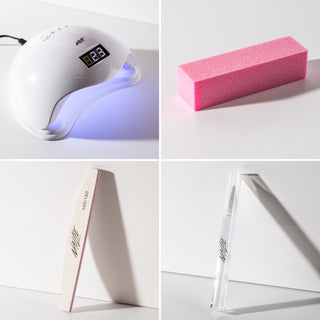
UV/LED lamp
With the UV/LED lamp, you don't have to wait long. The powerful UV/LED properties ensure quick and efficient curing of your nail products, saving you time and delivering professional results.
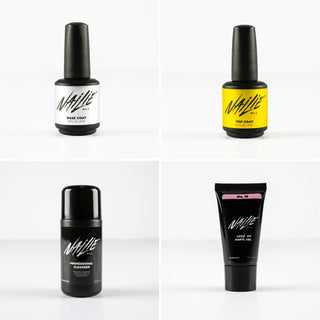
Base coat
The Base Coat strengthens your nails for up to 30 days. The Base Coat is applied to the nails and cured under the UV/LED lamp. The Base Coat helps the color adhere more smoothly and beautifully.
Top coat
The Top Coat strengthens your nails for up to 30 days. The Top Coat is applied on top of the color and cured under the UV/LED lamp for 60 seconds. The result of the Top Coat is a super shiny and beautiful surface.
Polygel • Light Rose • No. 18
Polygel is a combination of acrylic and gel. The product is used to extend/build your nails. You can use our templates/forms and our dual forms. You need to shape the acrylic gel using our cleanser and brush.
Polygel tips
In our dual forms nail tips, you'll find 12 different sizes. Creating extensions with these forms is incredibly easy and fast. You'll always achieve a beautiful and even result when using these forms.
Polygel brush
The polygel brush features two ends for versatile use. On one end, there's a brush that you can use to shape the polygel. On the other end, there's a spatula that's used to extract polygel from the tube and apply it directly to the nail.
Nail oil
Our nail oil is designed to care for your nails and cuticles in the most natural and soothing way. It is enriched with essential oils, including the lovely scent that will indulge your senses.
Cleanser
Our cleanser removes all the excess oils, dirt, dust, and grime that may be on the nails. The cleanser leaves the nails clear and clean, ensuring that the product's durability is preserved.
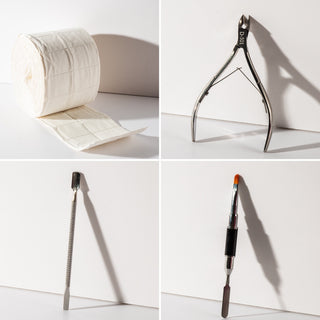
Cuticle clipper
The cuticle clipper is a great tool for trimming cuticles before applying Gel Polish or Acrylic Gel/Polygel to the nail. The product is made of stainless steel and is of the highest quality.
Cuticle pusher
The cuticle pusher is the perfect tool for pushing back your cuticles before applying Gel Polish or Acrylic Gel because nail products should not be applied to the cuticles.
Buffer
The buffer can be used for multiple purposes. Use it to lightly buff your natural nails/nail plates, so the nails become matte and ready to receive products. Or for the removal of products and refining polygel.
Nail file
The nail file has a 100-grit side, which is excellent for hard products like Polygel. On the other side, there is a 180-grit surface, which is great for removing less hard products like Gel Polish. It can also be used for shaping the nails.
Nail wipes
Nail Wipes can be used for various purposes. They are excellent when, for example, you're doing prep work and need to clean the nails with cleanser. The product can also be used for removal with Nailie's Remover. Additionally, the product is lint-free pads, which means they won't leave lint on the nail.
Guide for polygel with dual tips
Read how to use our polygel basic kit step by step.
PREP
Step 1
Push up your cuticles. Make sure to remove all the dead skin at the cuticle edge with our cuticle pusher.
PREP
Step 2
Use the cuticle clipper to gently trim the cuticles.
PREP
Step 3
Buff the nails lightly on the nail plate until they become matte.
PREP
Step 4
Take a wipe and thoroughly clean the nails with plenty of cleanser. After using the cleanser, it's very important not to touch the nails or allow dust/dirt to come into contact with them. This can cause the product to loosen.
Polygel application
Step 5
Apply a thin layer of base coat. Rub the base coat into the nail well. Once you are satisfied with the layer you have applied, cure it for 60 seconds in the UV/LED lamp.
Polygel application
Step 6
Squeeze a small bead of polygel out. Take our polygel 2-in-1 tool and use the spatula to pick up the acrylic gel. Place it on your dual tip. Dip the brush in cleanser and shape the polygel on the dual tip.
Polygel application
Step 7
Gently place the dual form on your nail. Start by positioning it close to the cuticle area. Make sure to press it gently, spreading it over the entire nail until it's covered with polygel. If any gets on the skin, remove it before curing. There should be no air bubbles in the polygel when you place it. Press the form firmly onto the nail.
Polygel application
Step 8
Flip the finger over, take the brush, and shape the polygel on the back to the desired shape and length. When you are satisfied with the result, cure it for 60 seconds under the UV lamp.
Polygel application
Step 9
After curing in the machine, you can gently peel off the dual form.
Filing
Step 10
Take a wipe and remove the sticky layer with cleanser after it has cured in the UV lamp.
Filing
Step 11
Start by filing the desired shape. Then, lightly file on the nail until it becomes smooth.
Filing
Step 12
Finish your filing by buffing the entire nail smooth.
Filing
Step 13
Take a clean wipe with cleanser and remove all dust and other debris from the nails.
Color & top coat + oil
Step 14
Apply the chosen color in a thin layer. It should cure for 60 seconds under the UV/LED lamp. Repeat the application on top of the first layer, then cure again. After it has cured, do not wipe off the sticky layer.
Color & top coat + oil
Step 15
Apply a thin layer of top coat. Let it cure for 60 seconds under the UV/LED lamp.
Color & top coat + oil
Step 16
Finish by massaging nail oil around the cuticles and the skin surrounding the nails.